

Things To Draw With Chalk Pastels
I absolutely love chalk pastels! They are so bright and colorful, easy enough for younger kids to use, and require little prep and just a few simple supplies. These 5 essential chalk pastel techniques for beginners will set kids up for pastel success!
Pastels are so fun for kids to explore! Take a look at my collection of chalk pastel art for more creative ideas kids will love.
Below you will find 5 different chalk pastel techniques that are easy for kids of all ages and abilities to try and have fun with!
We love creating and exploring with different art supplies and techniques. If you are looking for more art projects to try, take a look at our ultimate collection of amazing art projects for kids!
Chalk Pastel Techniques for Beginners
This post contains affiliate links, which come at no cost to you. If you would like more information please review my privacy & disclosure policy.
Buying chalk pastel supplies can be confusing! There is a range of prices and a variety of pastels and paper. You don't have to spend a lot of money to get started with chalk pastels.
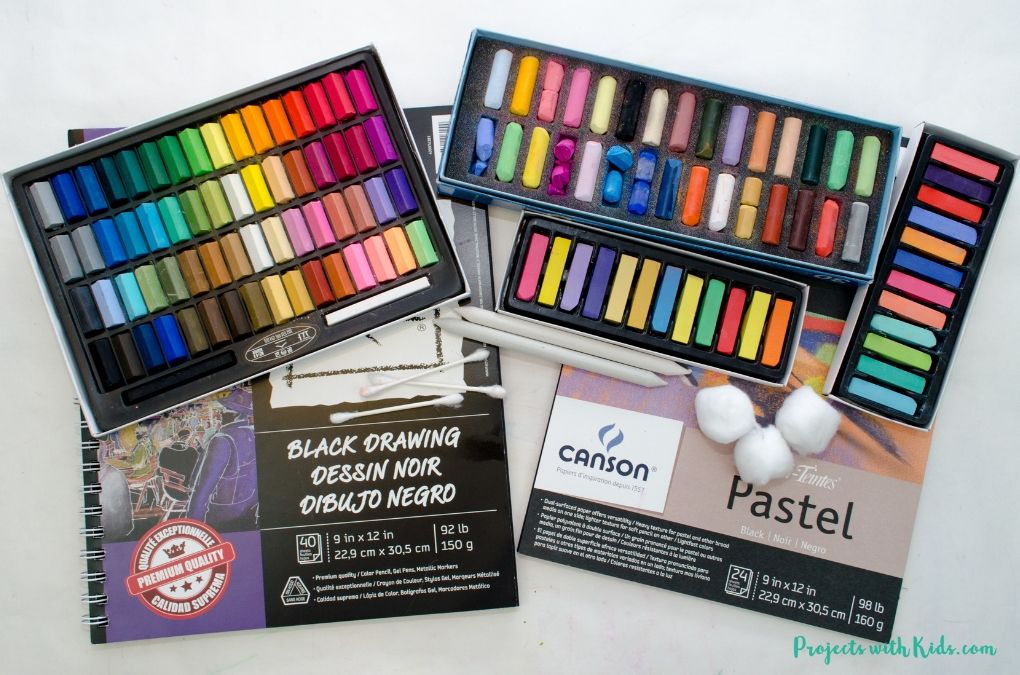
Supplies to get started with chalk pastels
For chalk pastels, I have used and like this brand and this brand. They are soft, have beautiful bright colors, blend nicely together and are inexpensive.
Using black paper with chalk pastels is my favorite! I love how the colors really pop. But finding black pastel paper can be difficult (and in some cases expensive), so I have also used black drawing paper and even black cardstock.
If you are using pastels in a classroom, you can even try black construction paper!
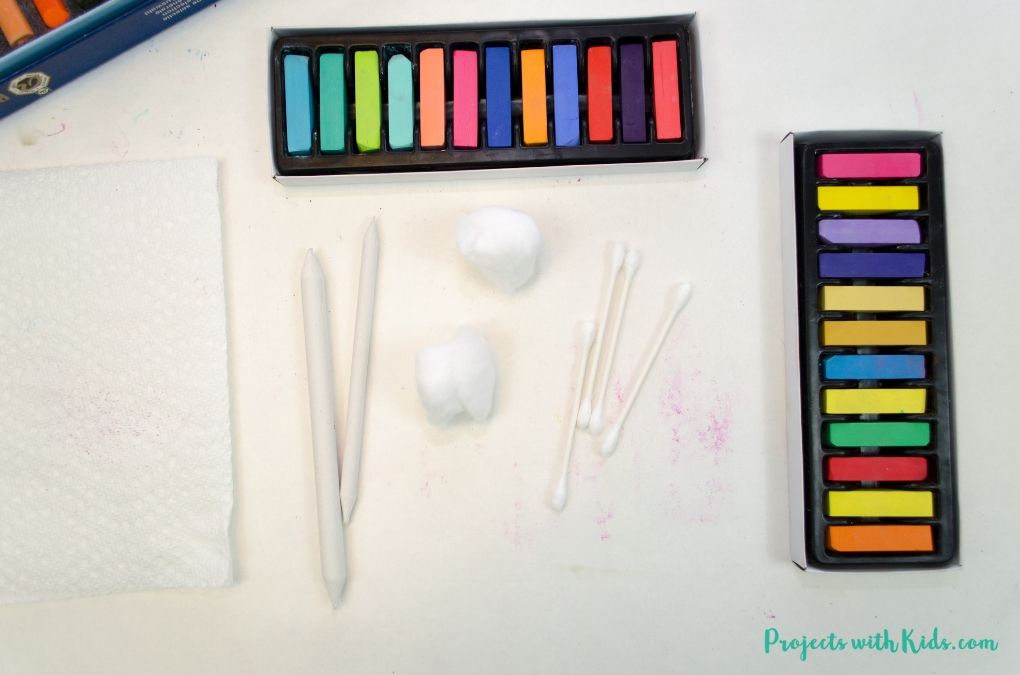
When you start experimenting with different blending techniques, you can use a q-tip, cotton balls or a blending stick.
Drawing with Chalk Pastels
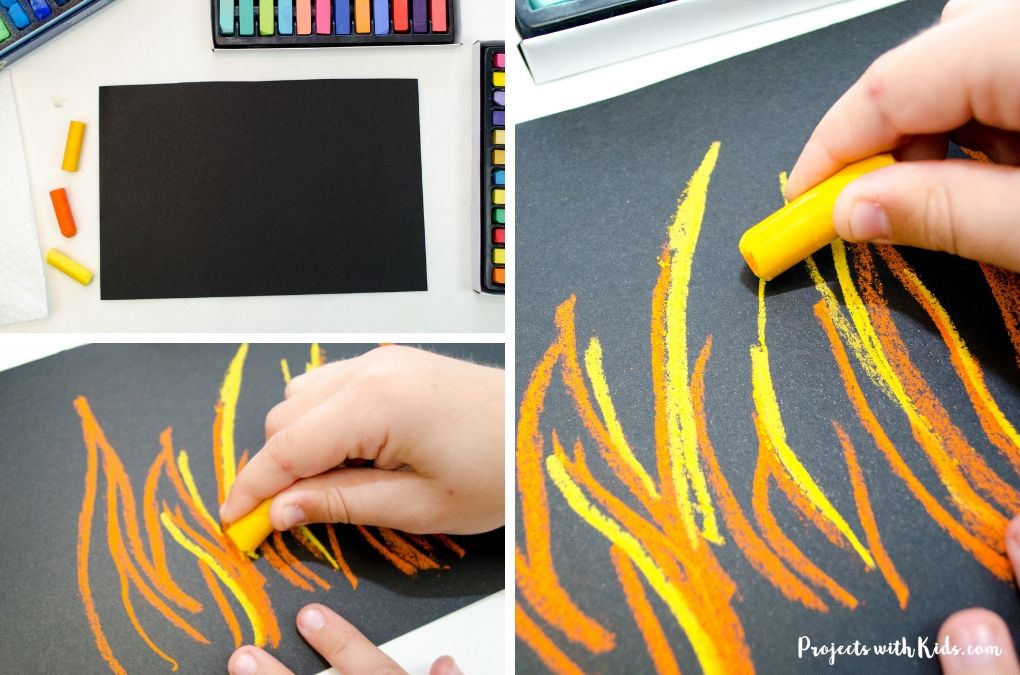
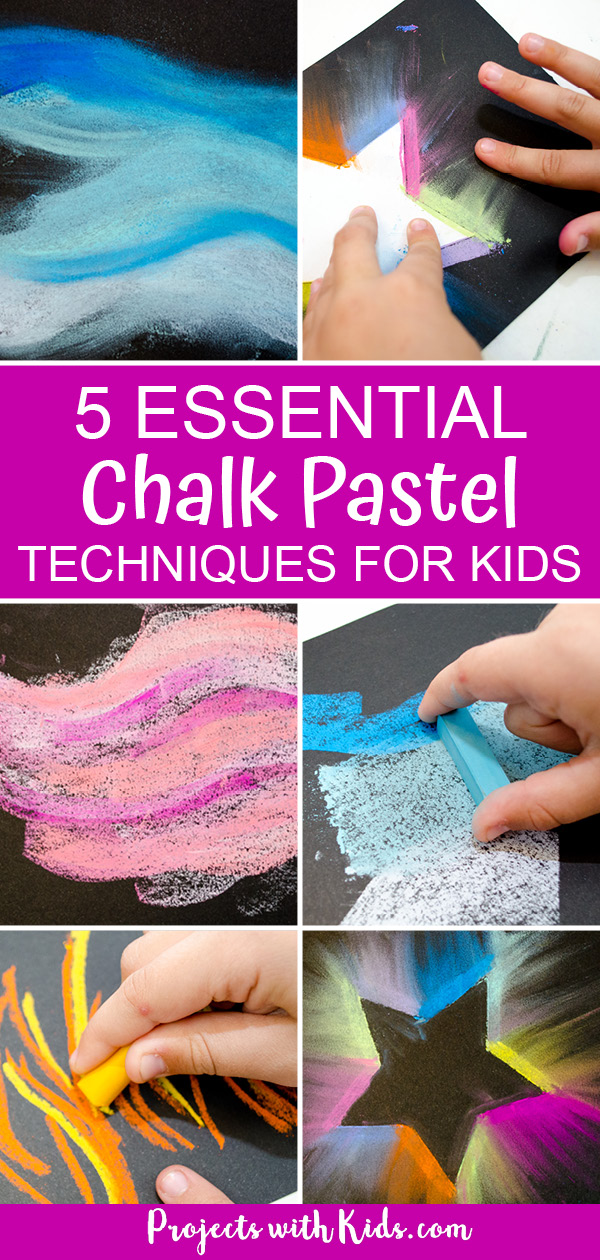
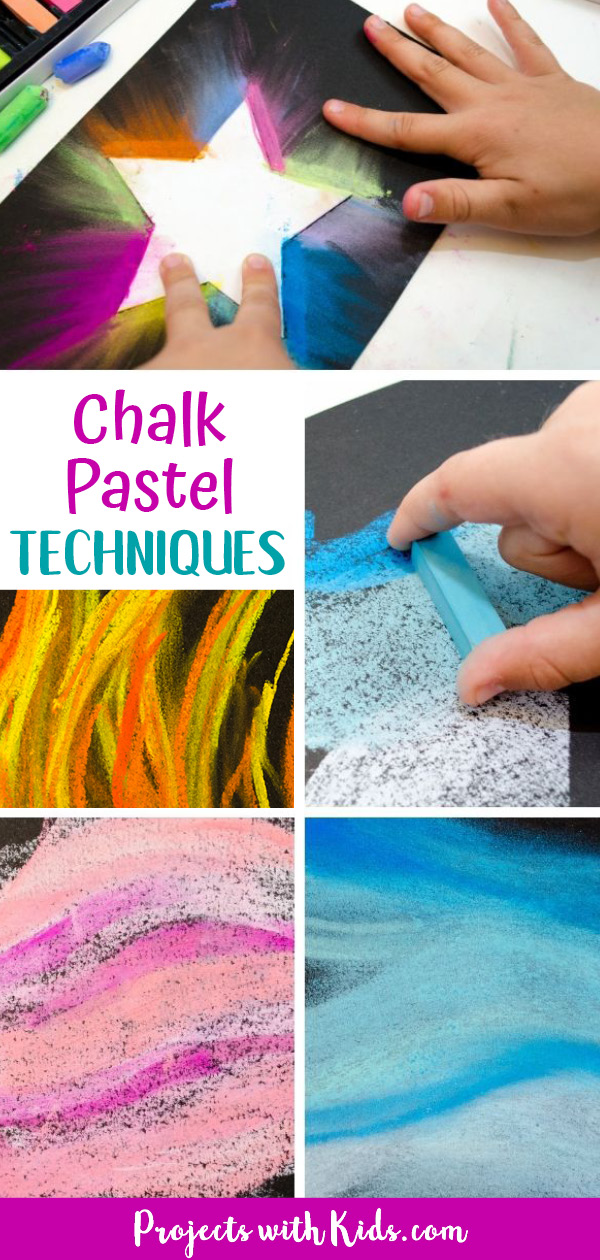
Perhaps one of the most basic and easy techniques to try with chalk pastels is just simply to draw with them! There is no right or wrong way to do this, hold the pastel like a pencil and start to draw.

You can layer the colors as you go, and just experiment with different types of lines. This is a great first technique for kids to try, they can try drawing a picture with pastels instead of using crayons or markers.
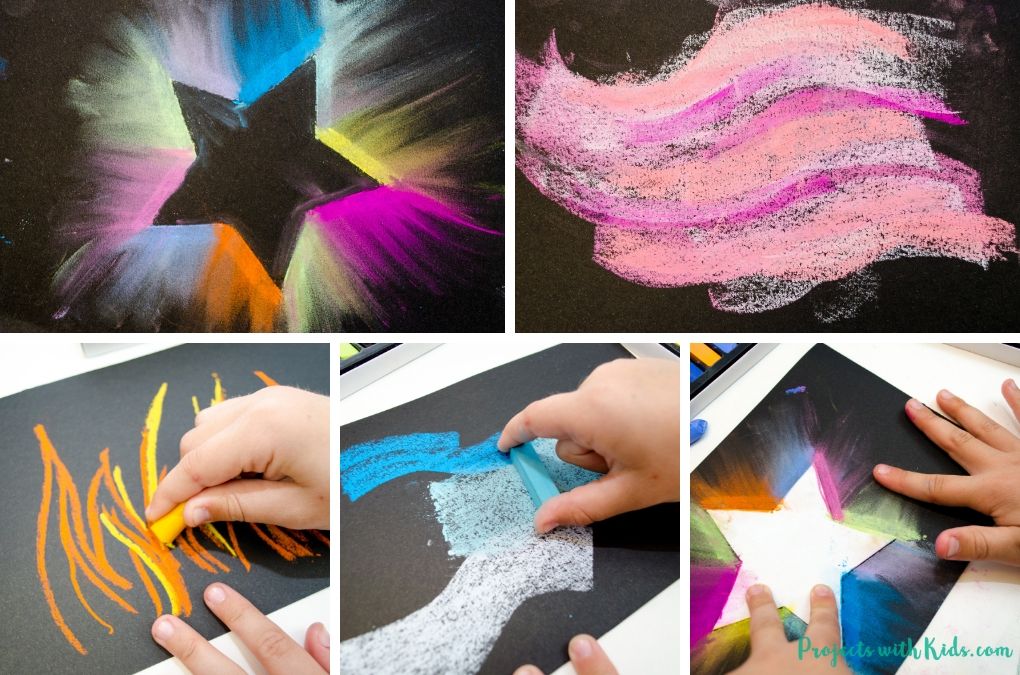
You can see this pastel technique in action in these shooting star paintings with chalk pastels and this winter snow globe craft.
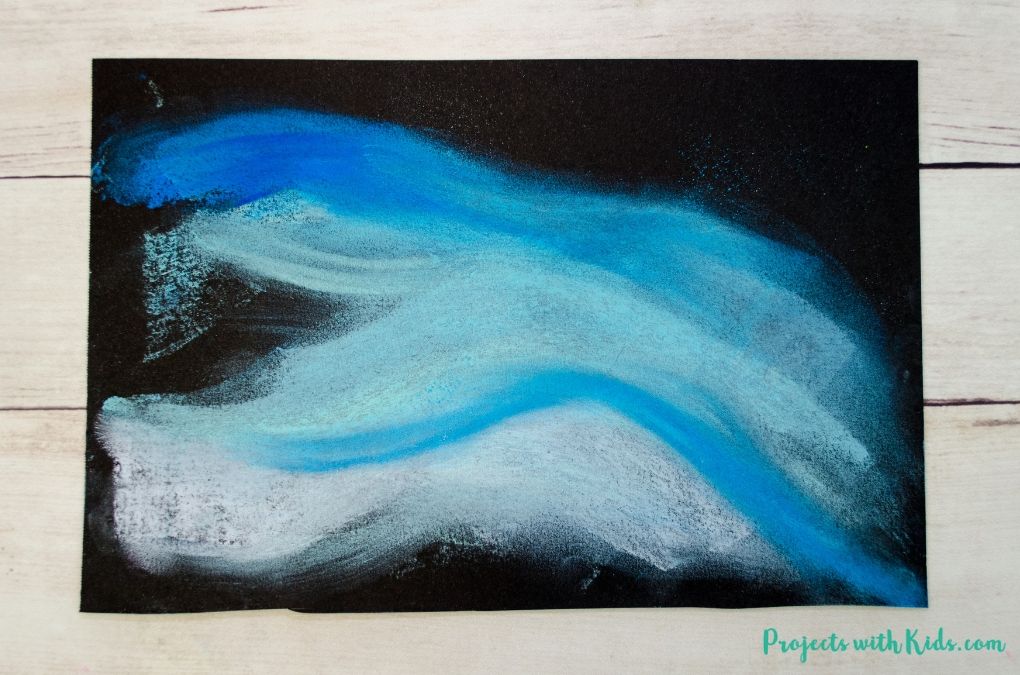
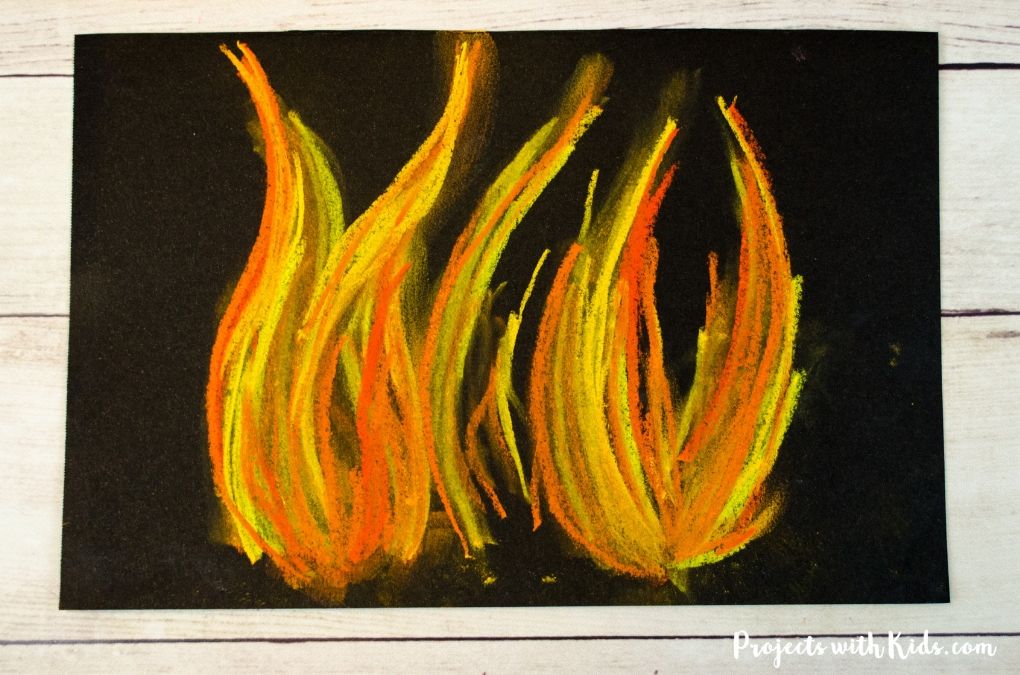
Using the flat edge of chalk pastels to create texture
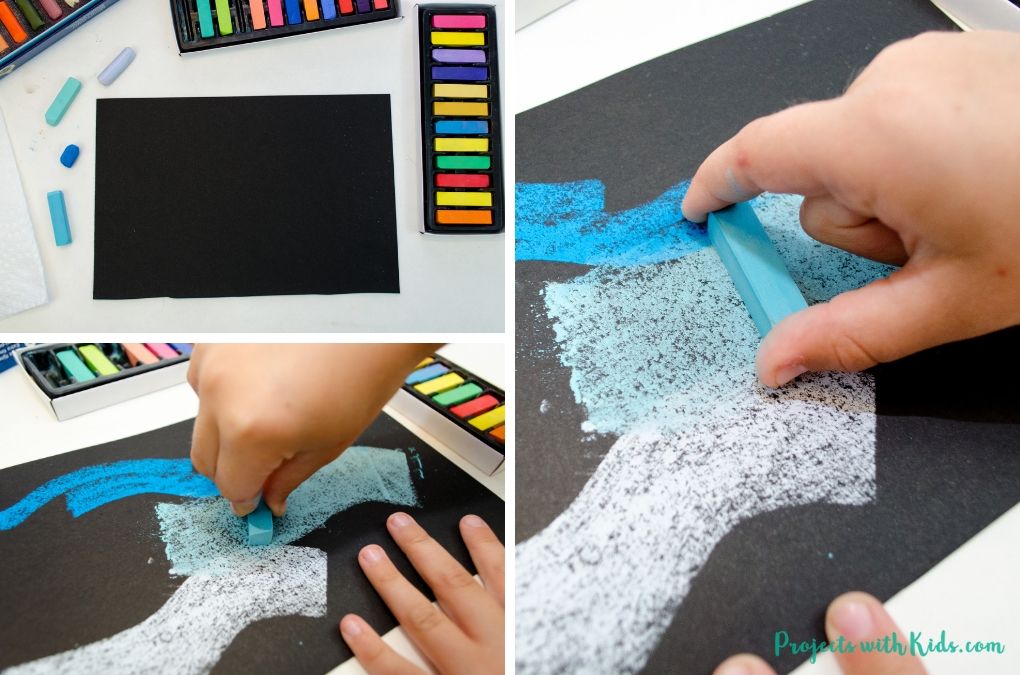
I love this technique! It instantly creates texture and interest in your pastel art. Using the flat edge of your pastel can cover a big area of your paper quickly and is great for showing water or sky.
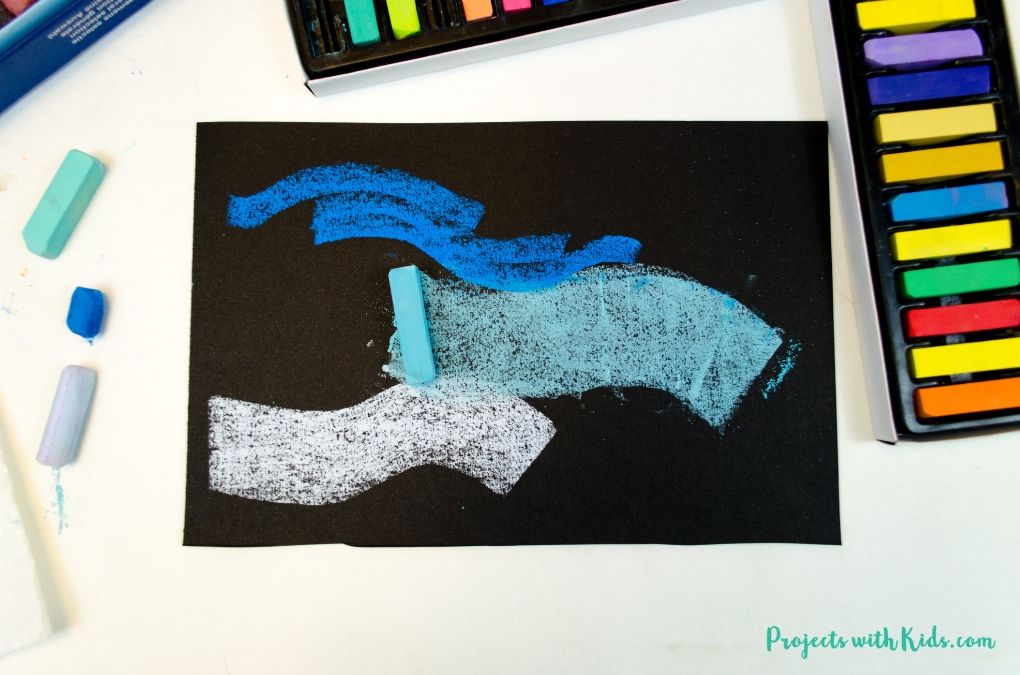
Hold the pastel on its side and drag it across your paper. You can drag it straight across or make wavy lines as you go. This technique is fun for kids to experiment with!
You can see an example of how we use this technique in our chalk pastel sunsets with kids.
Layering with Chalk Pastels

Layering with chalk pastels really goes hand in hand with the drawing and the flat edge techniques.
Pick out 2 or 3 colors you want to practice layering with. Start with 1 color and draw or use the flat edge of the pastel. Then add on another color on top. Add on your 3rd color if you like.
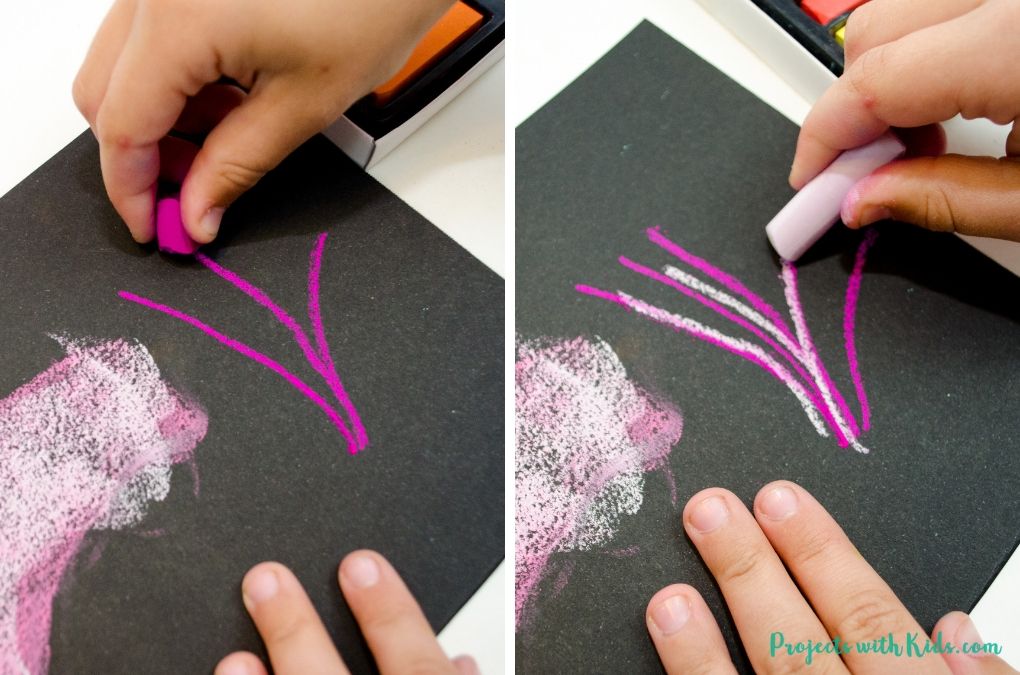
And it's really that simple!
You can use layering to show the different colors of water or sky, to show different shades of grass or flowers. It's a very versatile technique that is fun to do!
I love layering colors on top of each other and seeing what the different colors look like together.
You can see how we used the layering techniques in our chalk pastel sunsets with kids, this winter snow globe craft and our shooting star paintings. Each one with different results!
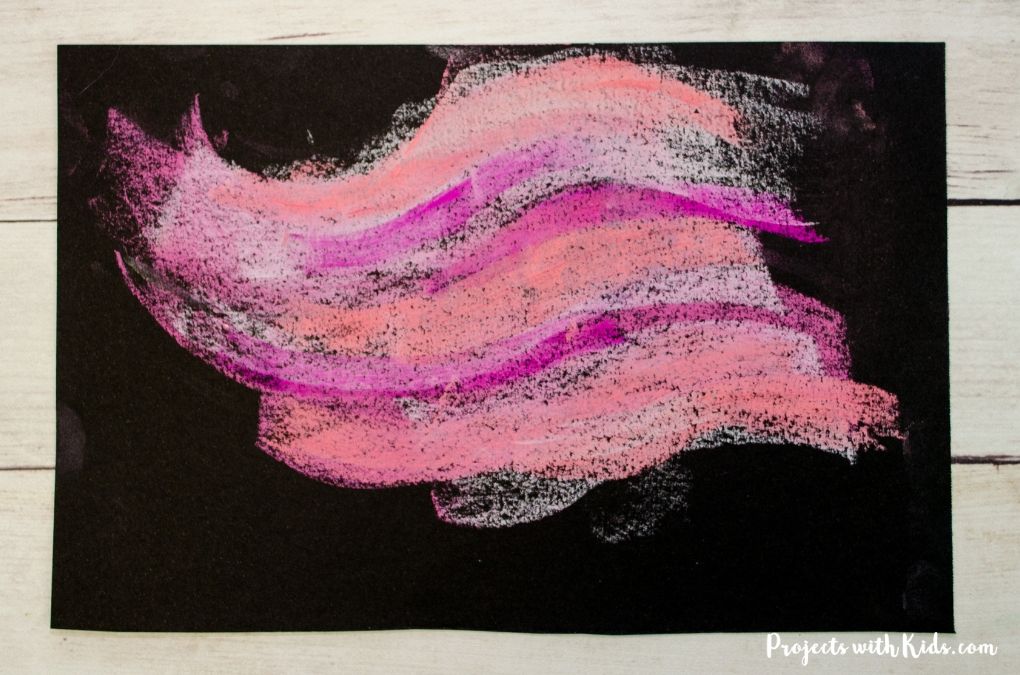
Chalk Pastel Blending Technique
Just like with the layering technique above, blending with chalk pastels works perfectly with the other techniques. You can blend your colors together after drawing with them, using a flat edge and layering your colors.
There are a few different ways to blend your pastels together, kids can try out a few and decide which ones they like best.

The easiest way is to just use your fingers. I like to use my first finger or my first 2 fingers to blend.
This is my favorite way to blend pastels, but sometimes kids don't like the feeling of the chalk on their hands or they don't want to get messy, so there are other options.
You can also use a q-tip or cotton ball. Using a cotton ball can work for blending larger areas if you don't want to use your fingers. But it can also take off a lot of the color, so it's not my favorite option.
Using a q-tip for blending small detail areas can work great!
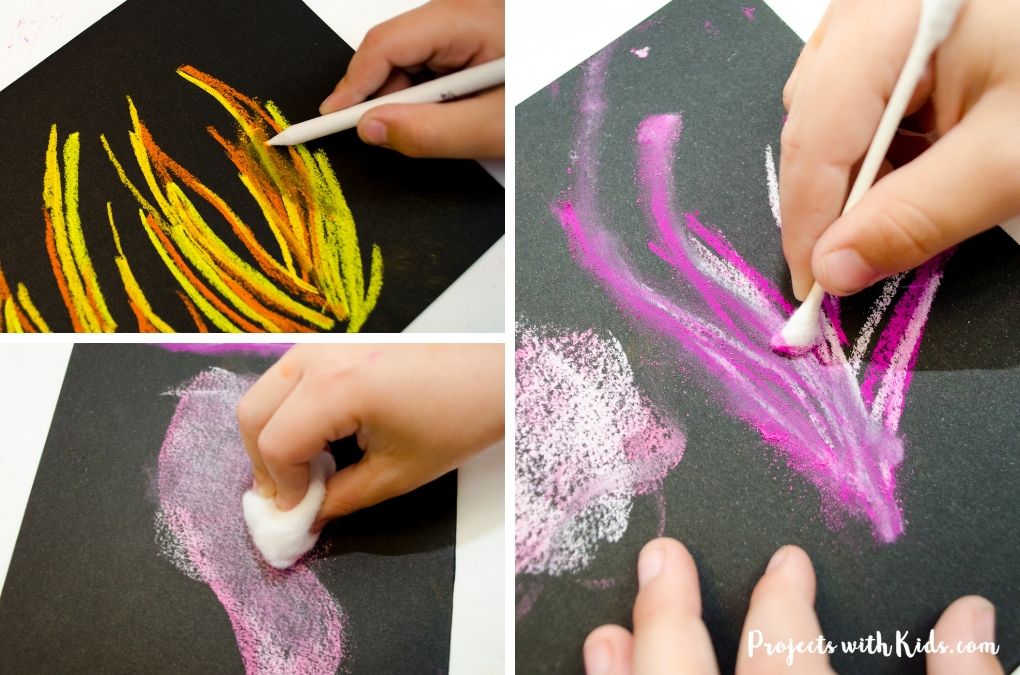
You can also use a blending stick. These come in different sizes from quite large to small. I like to use blending sticks when I don't want to get my hands dirty.
As you blend, you can add more colors on top and blend some of them or just leave them. Make sure to blend all in the same direction, blending back and forth can rub off too much color and make things look muddy.
The key to blending is to not overdo it, a little blending goes a long way!
Using a Template with Chalk Pastels
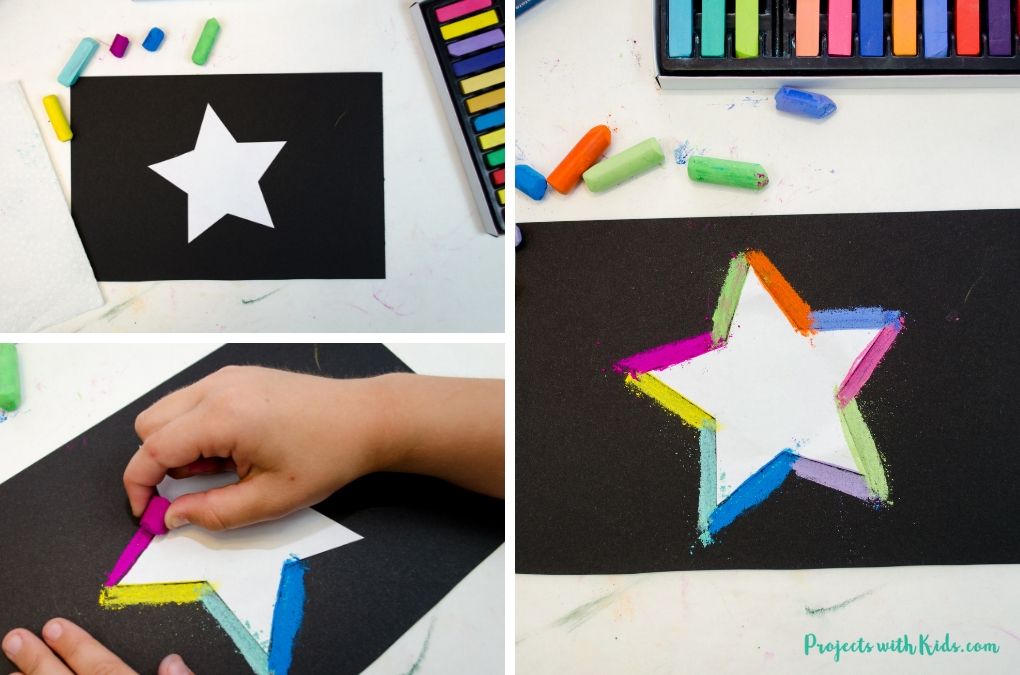
Using a template is one of my favorite ways to really add the wow factor to chalk pastel art. It's a very simple technique that kids of all ages can do and it looks great every time!
I love how kids can choose the colors they want to use to really make it unique.
It's best to use cardstock paper for your template and to tape it down to your pastel paper with some painter's tape.
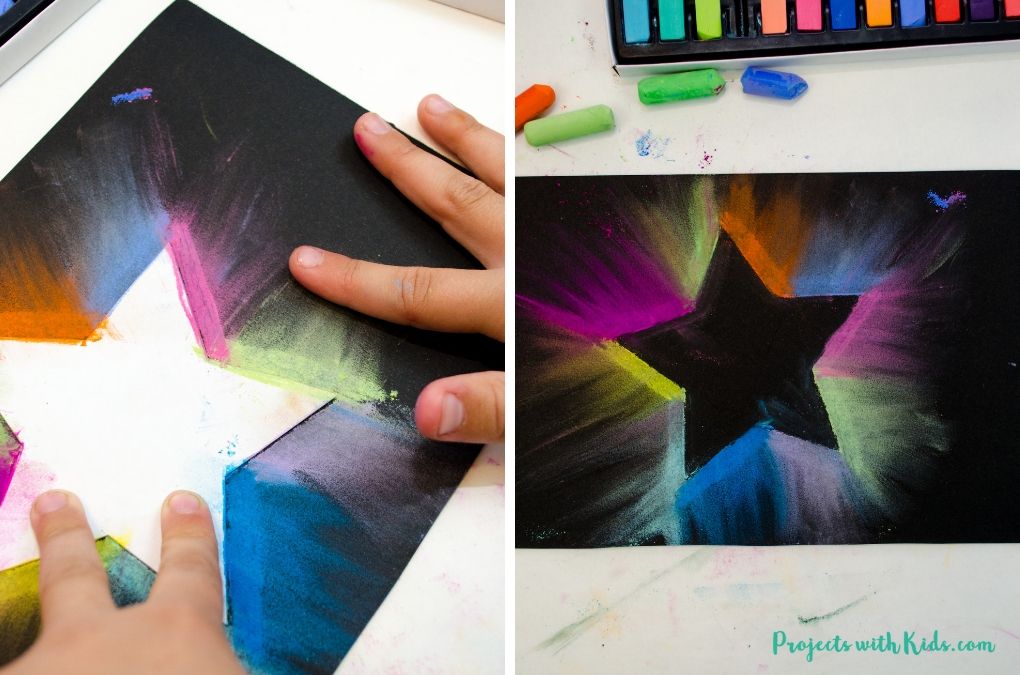
Draw around your template with thick pastel lines. Kids can choose the colors they use, 1 or 2 colors or multiple colors. Using your fingers or a blending tool (like a blending stick or q-tip) blend the colors outward, in the same direction.
Keep going around your template until your colors are all blended. Carefully remove your template.
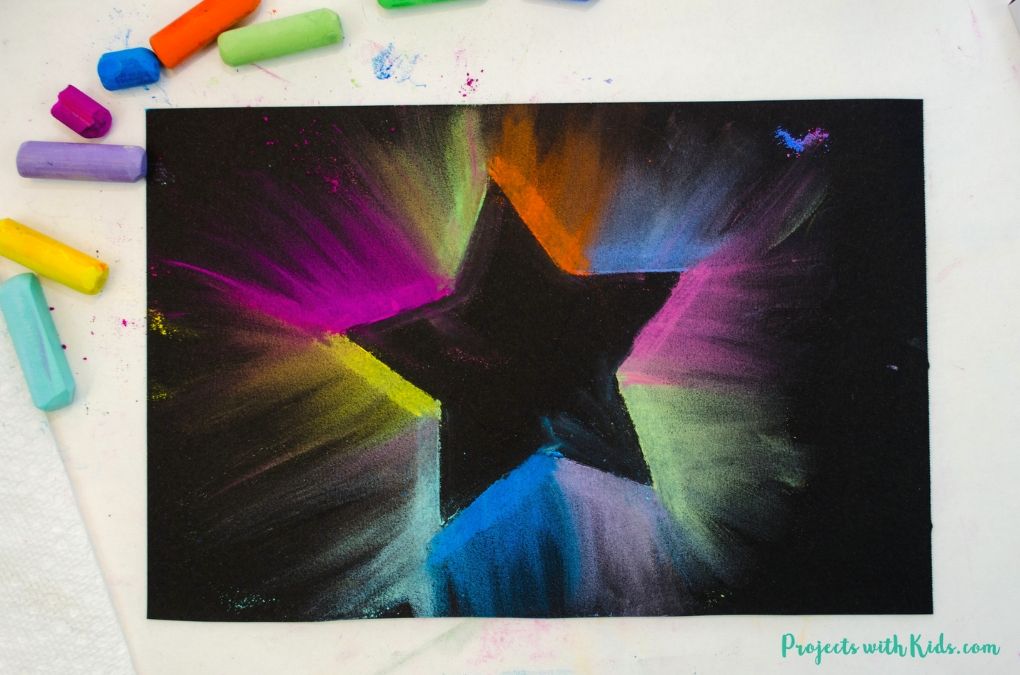
If there is a lot of chalk dust you can take your artwork outside and blow or shake the dust off.
We use this technique a lot, you can see examples in this bunny art with chalk pastels and this Canada Day chalk pastel art, which only uses 2 colors.
These easy chalk pastel techniques for beginners will help kids learn about different ways to use pastels and give them a chance to explore and have fun!
More Art Projects You will Love
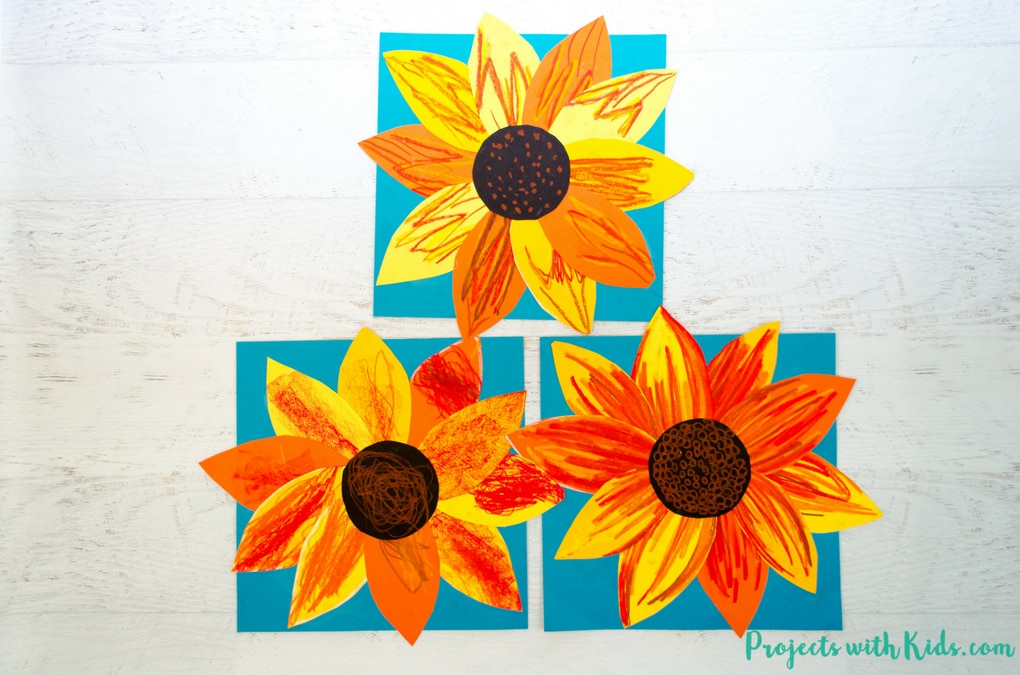
Autumn Sunflower Craft with Oil Pastels
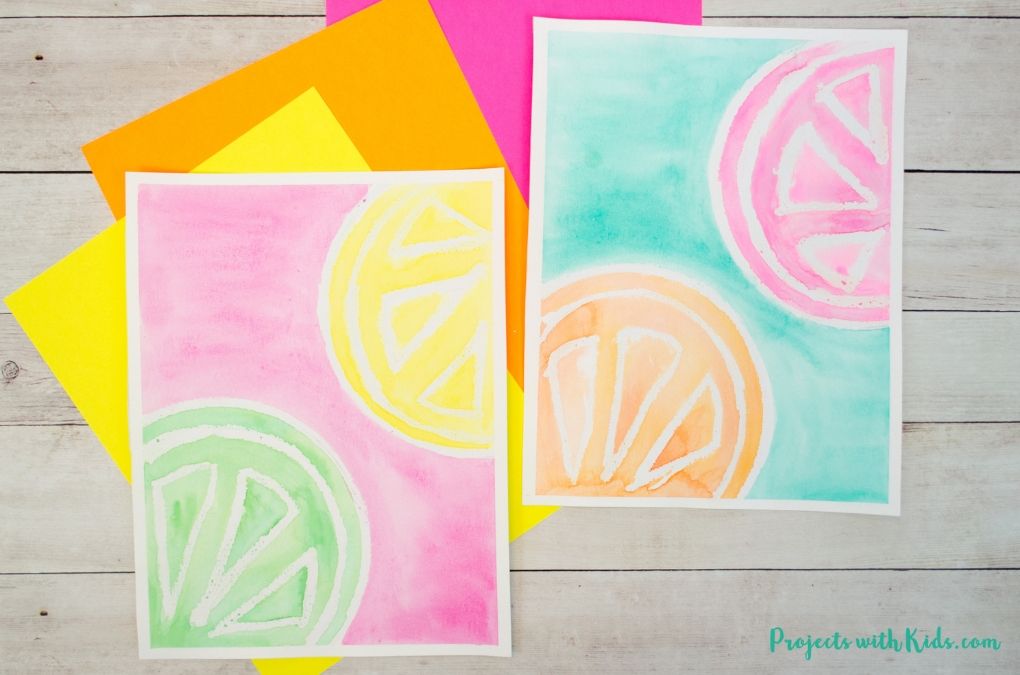
Bright & Fun Watercolor Resist Citrus Painting for Kids
Follow me on Pinterest for more amazing project ideas.
Pin these pastel blending techniques for later
Prep Time 5 minutes
Active Time 30 minutes
Total Time 35 minutes
Difficulty Easy
Materials
- Chalk pastels
- Black pastel paper or black drawing paper, you can also try using black cardstock or construction paper
- Q-tips (optional)
- Cotton balls (optional)
Tools
- Blending stick (optional)
Instructions
- Drawing with chalk pastels
This is probably the easiest technique for kids to get started with. Hold the pastel like a pencil and start to draw.Kids can try drawing a picture with chalk pastels instead of using crayons or markers.
- Using the flat edge of your pastels
This is one of my favorite techniques! Hold the pastel on its side and drag it across your paper. Try drawing straight lines and wavy lines.This is a great technique to cover a large area of your paper and to add texture and interest to your pastel art.
- Layering with chalk pastels
Layering really goes hand in hand with drawing and the flat edge techniques.Choose 2 or 3 colors you want to practice layering with. Start with 1 color and draw or use the flat edge of your pastel. Take your second color and layer it on top.
This is a very simple technique that can add dimension and impact.
- Chalk pastel blending technique
Blending with chalk pastels works perfectly with the other techniques and is very simple to do. You can use your fingers to blend or try using a q-tip, cotton balls or blending stick.My favorite way is to simply use my fingers to blend. Use your first finger or your first 2 fingers and gently blend together your pastels, blending in the same direction.
Try using a q-tip to blend smaller detail areas. You can also try using a blending stick, these come in various sizes.
Using a cotton ball can also work to blend larger areas, however, it tends to remove a lot of the color so it's not my favorite way to blend pastels.
For kids who don't like to get their hands messy, a q-tip or blending stick works great!
- Using a template with chalk pastels
This is one of our favorite chalk pastel techniques! It's easy for kids of all ages and always looks great.Use a template cut out of cardstock and tape it down to your paper. Draw thick lines around your template. Kids can choose to use multiple colors or just 1 or 2 colors.
Using your fingers or a q-tip or blending stick, blend the pastels outward in the same direction. Continue blending outward around your entire stencil.
Gently lift your stencil off and blow or shake off the excess dust. This should be done outside.
These easy chalk pastel techniques for beginners are a great first step for kids to practice and explore chalk pastels!
Things To Draw With Chalk Pastels
Source: https://www.projectswithkids.com/chalk-pastel-techniques-for-beginners/
Posted by: wagonerwhiden.blogspot.com
0 Response to "Things To Draw With Chalk Pastels"
Post a Comment